The Irresistible Charm of Pistachio Cannoli
There’s something downright enchanting about biting into a perfect cannolo: the contrast between the crisp, bubbly shell and the creamy, dreamy filling is nothing short of addictive. When that filling is flavored with earthy-sweet pistachios, the experience becomes even more irresistible. Sicilian pistachio cannoli are a luxurious twist on the classic Italian pastry, elevating the traditional ricotta filling with the nutty richness of finely ground pistachios.
These cannoli strike a perfect balance — indulgent yet delicate, traditional yet delightfully fresh. Whether you’re making them for a special holiday, a dinner party finale, or just because you want to try your hand at a classic Italian pastry, this detailed guide will walk you through every step, from crisping the shells to achieving a velvety smooth pistachio ricotta filling.
Making cannoli at home does take time and some attention to detail, but it’s absolutely worth the effort. Once you master the technique, you’ll never look at a store-bought version the same way again.
Choosing the Right Ricotta for the Filling
The quality of your ricotta makes or breaks the filling. Choose whole milk ricotta that’s firm and not too wet. Avoid pre-whipped or “smooth” ricotta spreads, which often contain stabilizers and excess moisture.
Pro tip: Even good-quality ricotta contains some liquid. For best results, drain the ricotta overnight in a fine mesh sieve or cheesecloth-lined colander set over a bowl in the fridge. This step ensures your filling will be thick, creamy, and hold its shape when piped into the shells.
Why Pistachios Shine in Cannoli
Sicilian pistachios, especially those from Bronte, are prized for their intense green color and sweet, rich flavor. They’re more expensive and sometimes hard to find, but don’t worry — any raw, unsalted pistachios will work beautifully.
To get the most out of the pistachios:
- Use finely ground pistachios in the filling for flavor and texture.
- Coat the cannoli ends with crushed pistachios for a beautiful, crunchy garnish.
- Optionally, add a bit of pistachio paste (homemade or store-bought) for even deeper flavor.
Roast the pistachios lightly if they’re raw — just 5–6 minutes at 350°F (175°C) will enhance their nuttiness without turning them bitter.
Crafting the Perfect Cannoli Shells
The shells are what make cannoli iconic — ultra-crisp, golden brown, and flecked with bubbles from the frying process. They’re traditionally made with a dough enriched with a little sugar, vinegar or wine, and sometimes egg. Rolled thin and wrapped around metal cannoli tubes, they’re fried until blistered and hollow.
To ensure a crisp, flaky shell:
- Roll the dough as thinly as possible (a pasta roller works wonders).
- Let the dough rest before rolling to relax the gluten.
- Use white wine or vinegar in the dough — it reacts with the gluten to promote blistering during frying.
- Fry in hot oil (350–375°F / 175–190°C) and don’t overcrowd the pot.
You can make the shells in advance — they store well for up to a week in an airtight container. Never fill them ahead of time, though; they’ll go soggy within hours.
What You’ll Need: Tools and Equipment
Cannoli-making doesn’t require fancy gadgets, but a few essentials help tremendously:
- Cannoli tubes (metal molds) for shaping the shells
- Rolling pin or pasta roller for thin dough
- Heavy-bottomed pot or deep fryer for frying
- Slotted spoon or spider for safe oil handling
- Pastry bag with round tip for piping the filling
- Fine mesh sieve or cheesecloth for draining ricotta
- Thermometer to monitor oil temperature
Optional but helpful: food processor for grinding pistachios and making a smooth filling.
Easy Substitutions and Flavor Variations
Don’t want to fry?
You can bake cannoli shells made from rolled-out pie crust or use phyllo cups for a cheat version. The texture isn’t quite the same, but it’s a good shortcut.
Can’t find ricotta?
Use mascarpone or a 50/50 blend of mascarpone and Greek yogurt. Texture will be silkier and slightly tangier.
Want to mix up the flavor?
- Add orange zest or a splash of orange blossom water for a floral note.
- Dip one end of the shell in melted chocolate before filling.
- Mix in mini chocolate chips or candied citrus peel for texture and contrast.
Key Tips for Assembly Success
Filling should be cold and fairly thick, like pipeable frosting. If it’s runny, chill it more or add a little powdered sugar. Use a piping bag for neat, symmetrical filling that doesn’t crush the shell.
Only fill cannoli right before serving, ideally within an hour or two. The shells are incredibly crisp when fresh but start softening quickly when exposed to moisture.
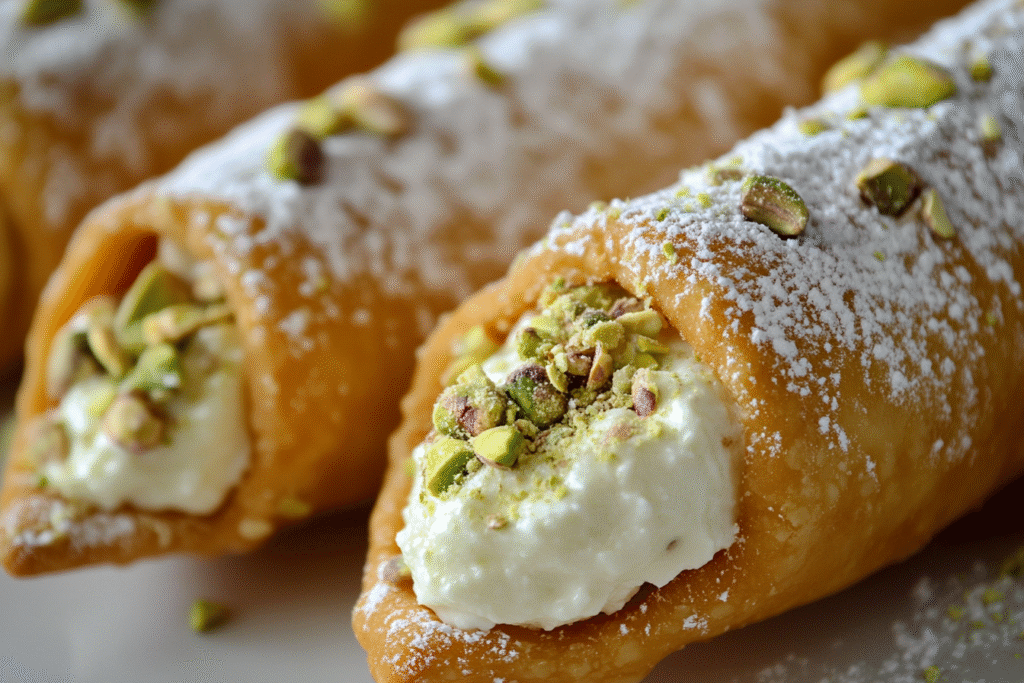
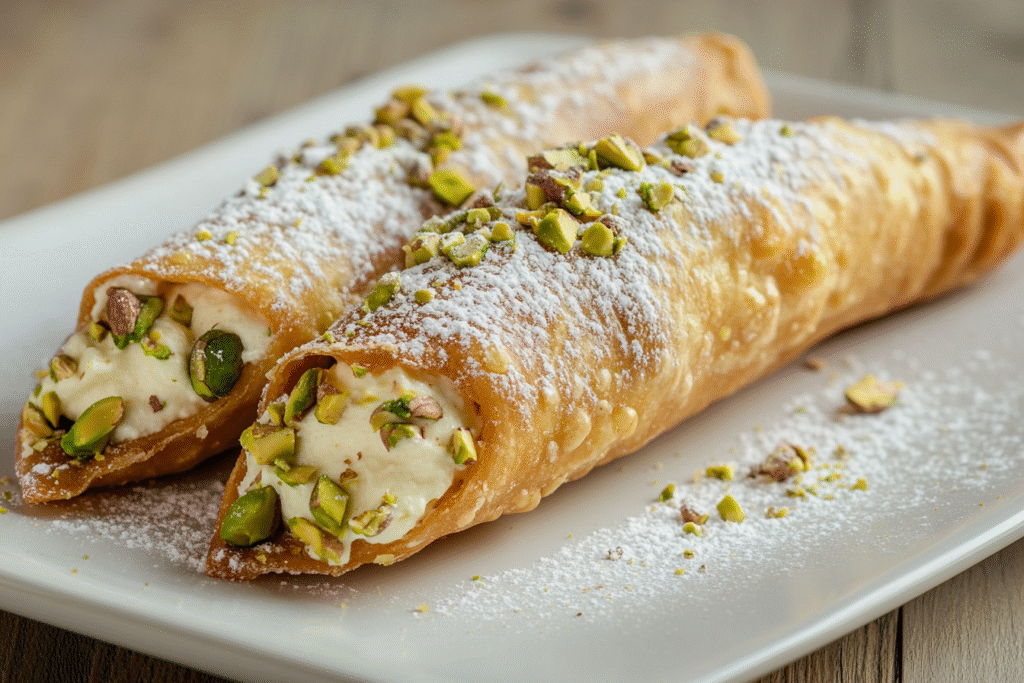
Dust with powdered sugar and add the pistachio garnish just before serving for the best visual and textural impact.
Ingredients
For the Cannoli Shells
- 2 cups (250g) all-purpose flour
- 1 tbsp granulated sugar
- 1/4 tsp salt
- 2 tbsp unsalted butter, cold and cubed
- 1 large egg
- 1/4 cup (60ml) white wine or dry Marsala
- 1 tbsp vinegar (white or apple cider)
- Oil for frying (vegetable or canola)
For the Pistachio Ricotta Filling
- 1 3/4 cups (425g) whole milk ricotta, well-drained
- 3/4 cup (90g) powdered sugar (plus more to taste)
- 1/2 cup (60g) finely ground raw unsalted pistachios
- 1/2 tsp pure vanilla extract
- Optional: 2 tbsp pistachio paste for intensified flavor
For Garnish
- 1/2 cup finely chopped pistachios
- Powdered sugar, for dusting
- Optional: mini chocolate chips or candied orange peel
Instructions
1. Make the Dough
- In a large bowl, combine flour, sugar, and salt.
- Cut in cold butter until mixture resembles coarse crumbs.
- Add the egg, wine, and vinegar. Stir until dough comes together.
- Knead on a floured surface for 5–7 minutes until smooth.
- Wrap in plastic wrap and rest at room temperature for 30–60 minutes.
2. Roll and Shape the Shells
- Divide dough in half. Roll each piece very thin (1/16-inch) or use a pasta roller.
- Cut into 4–5 inch circles. Wrap each circle around a metal cannoli tube, sealing the edges with water or egg white.
3. Fry the Shells
- Heat oil in a heavy pot to 350–375°F (175–190°C).
- Fry 2–3 cannoli at a time until golden and bubbly, about 1–2 minutes.
- Carefully remove with a slotted spoon and drain on paper towels.
- Cool slightly before gently sliding shells off the tubes.
- Let cool completely before filling. Store in airtight container if making ahead.
4. Make the Pistachio Ricotta Filling
- In a bowl, mix drained ricotta, powdered sugar, ground pistachios, and vanilla.
- Optional: Add pistachio paste for a more intense nutty flavor.
- Stir until smooth and creamy. Adjust sweetness to taste.
- Chill for at least 1 hour before piping.
5. Assemble the Cannoli
- Transfer filling to a piping bag fitted with a round tip.
- Pipe filling from both ends of each shell, filling completely.
- Dip both ends in chopped pistachios or chocolate chips.
- Dust with powdered sugar just before serving.
FAQ & Troubleshooting
Can I make the shells ahead?
Yes! Store in an airtight container at room temperature for up to 1 week. Never refrigerate or they’ll lose their crunch.
Can I freeze the filling?
No, ricotta doesn’t freeze well. It separates and becomes watery.
Shells collapsed or didn’t blister?
Make sure your dough was rolled thin enough and the oil was hot enough. Don’t skip the wine or vinegar — they help create those signature bubbles.
Filling is runny?
Your ricotta may not have been drained enough. Add more powdered sugar or some finely ground almonds to thicken if needed.
Cannoli vs. Cannolo: A Quick Note
“Cannoli” is plural, and “cannolo” is singular — so technically, you eat a cannolo and then can’t resist eating more cannoli. Either way, no one minds the grammar once they take a bite.
Storage Tips
- Unfilled shells: Store in an airtight container for up to 1 week.
- Filled cannoli: Best enjoyed within 1–2 hours of assembly.
- Leftover filling: Keep in the fridge for up to 3 days. Use as a dip with fresh fruit or cookies!
Dietary Substitutions
- Gluten-free: Use a gluten-free flour blend for the shells, but dough may be more delicate.
- Nut-free: Skip pistachios and use mini chocolate chips instead.
- Dairy-free: Use dairy-free ricotta alternatives (like almond- or tofu-based). Texture will vary.
Delightfully crisp, creamy, and rich with the flavor of pistachio, these Sicilian pistachio cannoli are a joyful, hands-on project with an absolutely unforgettable payoff. They’re a celebration in every bite — the kind of dessert that transforms any day into a special occasion.