Introduction
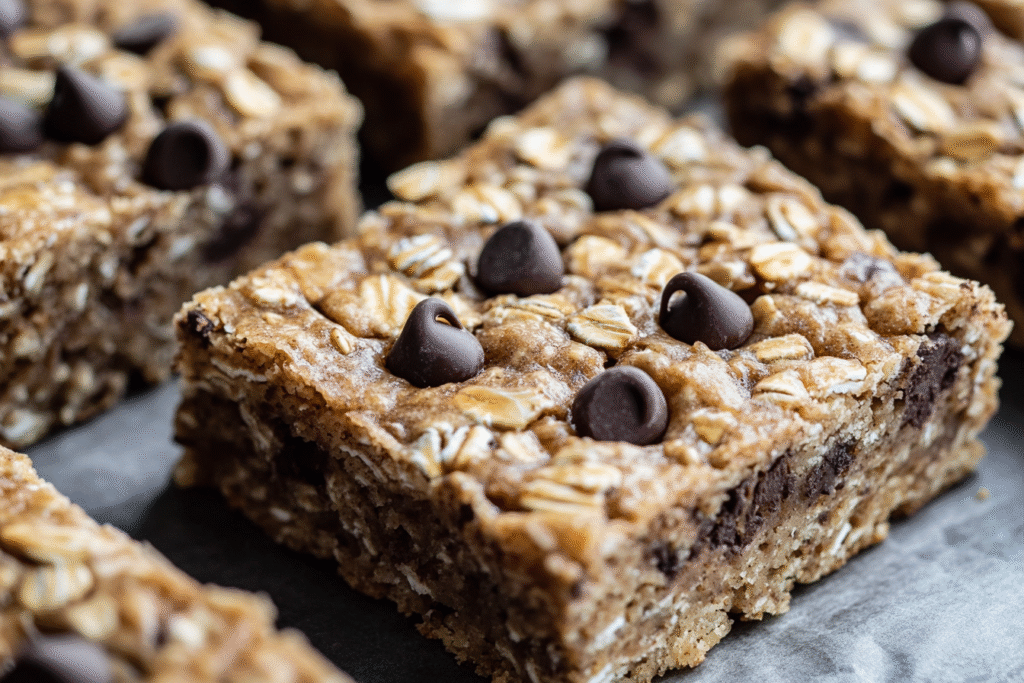
Banana Oatmeal Breakfast Bars are the ultimate make-ahead breakfast: soft, chewy, naturally sweetened, and packed with wholesome ingredients that keep you energized and satisfied throughout the morning. These bars combine ripe bananas, hearty oats, and just the right amount of sweetness to create a balanced, nutritious, and portable breakfast that’s perfect for busy mornings, lunchboxes, or pre-workout snacks.
Unlike overly processed granola bars or sugar-laden pastries, these banana oatmeal bars are easy to customize to your dietary preferences and nutritional goals. They’re naturally sweet from ripe bananas, can be made with or without added sugar, and easily accommodate a variety of mix-ins like nuts, seeds, chocolate chips, or dried fruit. Plus, they freeze beautifully, making them ideal for meal prepping.
This comprehensive guide will walk you through selecting the right ingredients, avoiding common issues like crumbly texture or soggy bottoms, and providing step-by-step instructions to achieve soft, cohesive bars with a satisfying chew. We’ll also explore flavor variations, storage tips, troubleshooting, and dietary substitutions to make these bars work for everyone.
Why Banana Oatmeal Breakfast Bars Are Perfect for Busy Mornings
These bars check all the right boxes for a practical, family-friendly breakfast:
- Portable: Ideal for on-the-go breakfasts and snacks.
- Make-Ahead Friendly: Prep a batch on Sunday and enjoy all week.
- Naturally Sweetened: Ripe bananas provide most of the sweetness.
- Freezer-Friendly: Store easily and reheat quickly.
- Customizable: Add your favorite nuts, seeds, or chocolate.
Whether you enjoy them as part of your morning routine, a mid-day snack, or a healthy dessert, these bars are satisfying without feeling heavy.
Common Pitfalls and How to Avoid Them
- Crumbly Bars: This happens when there’s not enough binding from the bananas or wet ingredients. Proper ratio of oats to bananas ensures the bars hold together.
- Soggy Texture: Using too many wet ingredients or under-baking can lead to soggy, undercooked bars. Bake until firm and lightly golden on the edges.
- Overly Dry Bars: Too few wet ingredients or over-baking can dry them out. Stick to the recommended ratios and check for doneness around the edges.
- Bars Falling Apart: Always let the bars cool fully before cutting. Warm bars are fragile and can crumble.
Selecting the Best Ingredients
- Bananas: Use very ripe bananas with lots of brown spots. The riper the banana, the sweeter and more flavorful your bars will be.
- Oats: Old-fashioned rolled oats provide the best chewy texture. Quick oats can make the bars too soft, while steel-cut oats won’t cook properly in this recipe.
- Nut Butter: Peanut butter, almond butter, or sunflower seed butter adds richness and helps bind the bars.
- Sweetener: Maple syrup or honey is optional but adds depth of flavor. You can also rely solely on the bananas for sweetness.
- Add-Ins: Customize with chocolate chips, dried fruit, chopped nuts, or seeds.
Recommended Equipment
- 8×8-inch or 9×9-inch Baking Pan: Perfect for evenly thick bars.
- Parchment Paper: Makes removing and slicing the bars much easier.
- Mixing Bowls: For combining wet and dry ingredients.
- Spatula: For spreading and smoothing the batter evenly.
Preparation Tips for Best Results
- Use Super-Ripe Bananas: They should be very soft with lots of brown spots for maximum sweetness and moisture.
- Line the Pan: Parchment paper ensures easy removal and clean cuts.
- Don’t Over-Bake: Bake just until the edges are golden and the center is set.
- Cool Completely: Allow to cool fully before slicing to help the bars hold their shape.
Flavor Variations and Add-Ins
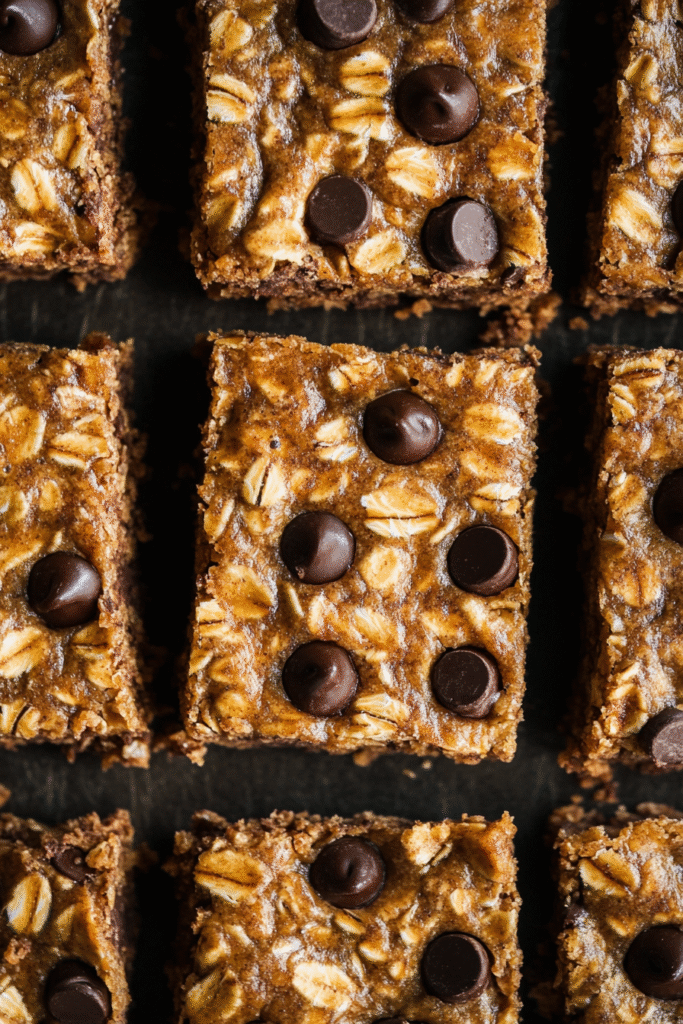
- Chocolate Chip: Add mini chocolate chips for a sweet twist.
- Nutty Crunch: Fold in chopped walnuts, pecans, or almonds.
- Fruit-Filled: Mix in dried cranberries, raisins, or chopped dates.
- Spiced: Add cinnamon, nutmeg, or pumpkin spice for a cozy flavor.
- Savory Edge: Skip the sweetener, use a pinch of salt, and add seeds and nuts for a more protein-focused bar.
Dietary Substitutions
- Gluten-Free: Use certified gluten-free oats.
- Nut-Free: Use sunflower seed butter instead of peanut or almond butter.
- Vegan: Use maple syrup instead of honey and ensure chocolate chips (if using) are dairy-free.
- Sugar-Free: Omit added sweeteners and rely on ripe bananas for natural sweetness.
Ingredients
Base
- 2 large ripe bananas, mashed (about 1 cup)
- 2 cups (180g) old-fashioned rolled oats
- 1/2 cup (120g) natural peanut butter or almond butter
- 2 tablespoons maple syrup or honey (optional)
- 1 teaspoon vanilla extract
- 1/2 teaspoon ground cinnamon (optional)
- 1/4 teaspoon salt
Optional Add-Ins
- 1/3 cup mini chocolate chips
- 1/3 cup chopped nuts (walnuts, pecans, almonds)
- 1/3 cup dried fruit (cranberries, raisins, dates)
Step-by-Step Instructions
1. Preheat and Prepare the Pan
- Preheat oven to 350°F (175°C).
- Line an 8×8-inch baking pan with parchment paper, leaving overhang for easy removal.
2. Mix Wet Ingredients
- In a large bowl, mash bananas until mostly smooth.
- Stir in peanut butter, maple syrup (if using), vanilla extract, cinnamon, and salt until well combined.
3. Add Dry Ingredients
- Add rolled oats to the wet mixture.
- Stir until fully incorporated. The mixture will be thick.
4. Fold in Add-Ins
- Gently fold in chocolate chips, nuts, or dried fruit if using.
5. Spread in Pan
- Press the mixture evenly into the prepared baking pan using a spatula or the back of a spoon.
6. Bake
- Bake for 20–25 minutes, or until the edges are lightly golden and the center is set.
7. Cool and Slice
- Let cool completely in the pan before lifting out and cutting into bars.
- Slice into 9–12 squares depending on your preferred portion size.
Troubleshooting Tips
- Bars Too Soft: Bake a few minutes longer or ensure bananas aren’t too large.
- Bars Too Dry: Use bananas that are fully ripe and don’t reduce the nut butter.
- Bars Crumbling: Always let the bars cool fully before slicing to help them firm up.
- Bars Sticking: Make sure to line the pan well with parchment paper.
Storage and Freezing
- Room Temperature: Store in an airtight container for up to 3 days.
- Refrigeration: Store in the fridge for up to 1 week.
- Freezing: Wrap individual bars and freeze for up to 2 months. Thaw overnight or microwave for 15–20 seconds.
Serving Suggestions
- Simple Breakfast: Grab a bar with your morning coffee or tea.
- Snack On-The-Go: Perfect for lunchboxes, car rides, or gym bags.
- Brunch Table: Serve with yogurt, fresh fruit, and hard-boiled eggs for a balanced breakfast spread.
- Warm Treat: Microwave briefly and drizzle with a bit of nut butter or honey for a cozy snack.
Banana Oatmeal Bars vs. Granola Bars vs. Baked Oatmeal
| Feature | Banana Oatmeal Bars | Granola Bars | Baked Oatmeal |
|---|---|---|---|
| Texture | Soft and chewy | Firm and crunchy | Moist and spoonable |
| Sweetness | Naturally sweetened | Often higher in sugar | Lightly sweet |
| Portability | Very portable | Very portable | Less portable |
| Cooking Method | Baked in a pan | Baked or no-bake | Baked in a casserole dish |
| Best For | Breakfast, snacks | On-the-go snacking | Sit-down breakfasts |
Banana Oatmeal Breakfast Bars are a winning combination of convenience, nutrition, and delicious flavor. Whether you keep them simple or load them with your favorite mix-ins, these bars are an easy addition to your breakfast rotation.


