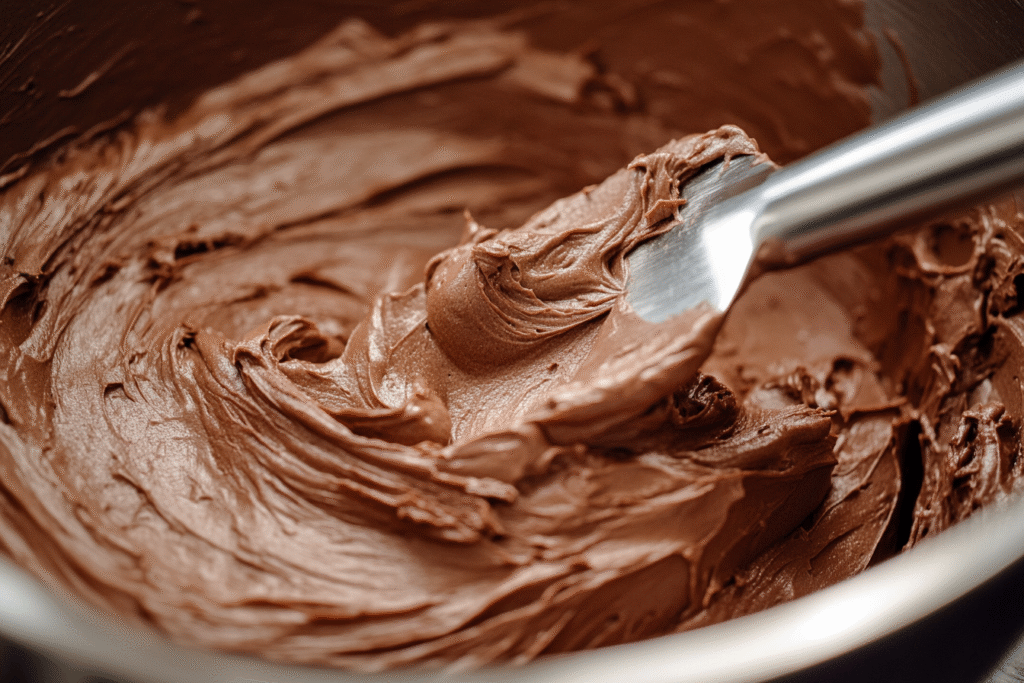
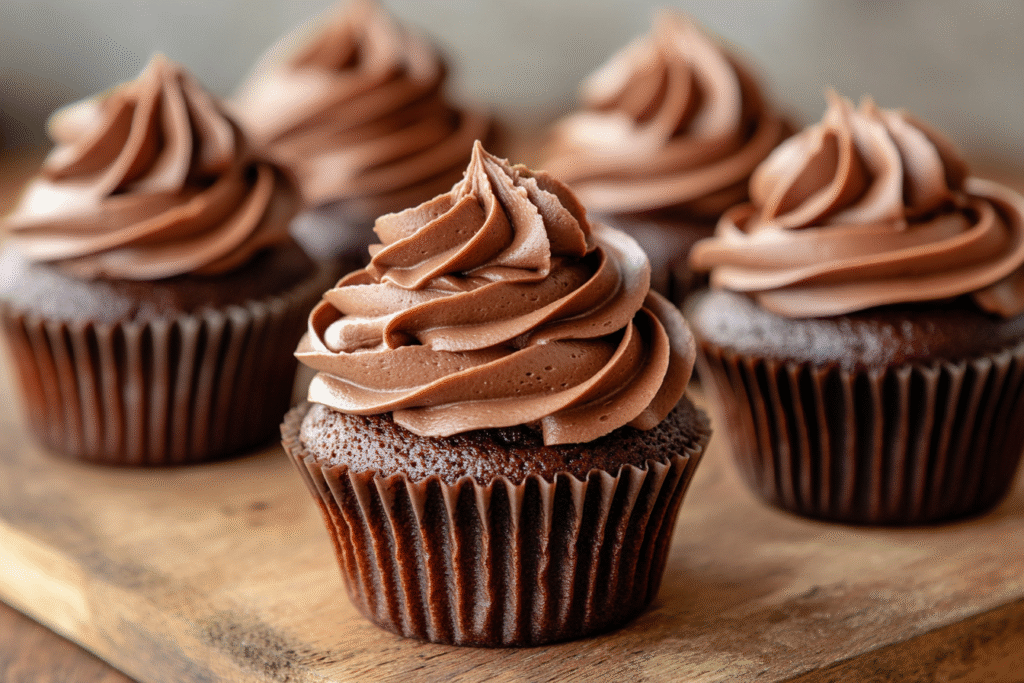
There’s something universally nostalgic and comforting about a well-made chocolate buttercream frosting. Silky yet fluffy, rich without being overpowering, and deeply chocolaty, it’s the crown jewel on everything from birthday cakes to cupcakes to sandwich cookies. But the perfect chocolate buttercream isn’t just about throwing sugar and cocoa in a bowl—it’s about technique, balance, and a few smart ingredient choices.
This recipe is for a classic American-style chocolate buttercream: sweet, creamy, and whipped to perfection. It comes together in under 10 minutes, with ingredients you likely already have in your kitchen. Whether you’re frosting a two-layer cake or simply eating it by the spoonful (no judgment), this guide walks you through every step—from softening your butter correctly to troubleshooting graininess, adjusting sweetness, and even customizing for different chocolate intensities.
Why This Chocolate Buttercream Works
This buttercream hits that sweet spot—both literally and figuratively. It’s sturdy enough to pipe onto cupcakes, smooth enough to spread on a cake, and rich enough to satisfy any chocolate craving. What sets it apart is its smooth texture, deep cocoa flavor, and perfect ratio of fat to sugar.
Unlike Swiss or Italian meringue buttercreams, this version doesn’t involve cooking or egg whites. It’s quicker, more forgiving, and incredibly versatile. The key lies in a few simple techniques: beating the butter until it’s pale and fluffy, sifting the sugar and cocoa, and incorporating just the right amount of cream for texture.

Common Pitfalls (and How to Avoid Them)
Even with a straightforward recipe like this one, a few missteps can throw off the final result. Let’s go over how to sidestep them:
- Grainy texture: This usually comes from unsifted cocoa or powdered sugar. Always sift!
- Too stiff or too runny: The texture of your butter (and how much cream you add) makes a big difference. Room temperature means soft but not melty.
- Overly sweet: Adjusting cocoa powder and adding a pinch of salt helps cut through the sugar.
- Butter separating: If your butter is too cold or your mixer speed is too high, the mixture can look curdled. Warm the bowl slightly and beat on low until it comes together.
Choosing Your Ingredients
This frosting relies on pantry basics, but the quality of those basics matters. Here’s what to look for:
- Butter: Use unsalted butter so you can control the salt level. Look for high-fat European-style butter if you want extra richness.
- Powdered sugar (confectioners’ sugar): The finer the better—this ensures a smooth texture.
- Cocoa powder: Unsweetened, natural cocoa gives a rich, classic chocolate flavor. Dutch-processed is smoother and darker if you want a more intense taste.
- Vanilla extract: Adds depth and rounds out the flavor.
- Milk or cream: Cream makes for a more luxurious texture; milk will work but results in a lighter finish.
- Salt: Just a pinch elevates the chocolate and cuts through sweetness.

Tools That Make a Difference
While you can make this frosting with a hand mixer or even by hand (with a lot of elbow grease), a stand mixer makes the process faster and fluffier.
Here’s the ideal setup:
- Stand mixer with paddle attachment or electric hand mixer
- Sifter or fine mesh sieve
- Rubber spatula (for scraping down the bowl)
- Measuring cups and spoons
- Offset spatula or piping bag (if frosting a cake or cupcakes)
Smart Swaps and Customizations
This frosting is endlessly adaptable. Here are a few ways to make it your own:
- Vegan/Dairy-Free: Use a plant-based butter and non-dairy milk. Opt for powdered sugar and cocoa labeled vegan-friendly.
- Less sweet: Reduce the powdered sugar by ½ cup and increase cocoa slightly. Taste and adjust.
- Extra chocolaty: Add 2 oz of melted and cooled semi-sweet chocolate for a ganache-style richness.
- Mocha twist: Mix in 1 tsp of instant espresso powder for a coffee-chocolate combo.
- Nutty variation: Add 2 tbsp of peanut butter or hazelnut spread for a new flavor dimension.
Texture and Flavor Tips
Buttercream frosting is all about texture, and texture is all about process:
- Whip it well. The longer you beat the butter, the fluffier the frosting. Start slow to combine, then beat on high for maximum volume.
- Sift every dry ingredient. Even a tiny clump of sugar or cocoa can ruin the smoothness.
- Taste as you go. Too sweet? Add a little more salt or cocoa. Too bitter? A spoonful of powdered sugar can balance it out.
- Temperature is everything. Too cold and the butter won’t cream; too warm and it melts.
Ingredients
For One 9-inch Two-Layer Cake or 24 Cupcakes:
- 1 cup (2 sticks) unsalted butter, at room temperature
- 3½ cups powdered sugar, sifted
- ½ cup unsweetened cocoa powder, sifted (natural or Dutch-processed)
- ¼ tsp fine sea salt
- 2–3 tbsp heavy cream or whole milk (adjust for texture)
- 1½ tsp pure vanilla extract
Optional for deeper chocolate flavor:
- 2 oz melted semi-sweet or dark chocolate (cooled slightly)
- 1 tsp instant espresso powder (dissolved in 1 tsp cream)
Step-by-Step Instructions
Step 1: Soften and Whip the Butter
Place the room-temperature butter in the bowl of a stand mixer fitted with the paddle attachment (or use a hand mixer). Beat on medium speed for 3–5 minutes until pale, creamy, and noticeably fluffy.
📝 Tip: The butter should be soft enough to press a finger into easily, but not melted or greasy.
Step 2: Sift and Combine Dry Ingredients
In a separate bowl, sift together the powdered sugar, cocoa powder, and salt. This removes any lumps and ensures a smooth frosting.
Step 3: Add Sugar Mixture Gradually
With the mixer on low, slowly add the sugar-cocoa mixture, ½ cup at a time, scraping the bowl often. Once incorporated, increase to medium speed and beat for another 2 minutes.
Step 4: Add Vanilla and Cream
Pour in the vanilla extract and 2 tablespoons of cream or milk. Beat on medium-high for 2–3 minutes. Add more cream, one teaspoon at a time, until the frosting reaches your desired consistency—smooth, fluffy, and easy to spread or pipe.
📝 Optional: Stir in melted chocolate or dissolved espresso at this point for an extra chocolate punch or mocha variation.
Step 5: Final Whip
Turn the mixer to high and beat for an additional 1–2 minutes for maximum fluffiness. Scrape down the sides and bottom of the bowl to ensure everything is incorporated.
Troubleshooting & Adjustments
- Too thick? Add cream or milk 1 tsp at a time.
- Too runny? Add a few tablespoons of powdered sugar and beat again.
- Not chocolaty enough? Add an extra tablespoon of cocoa or a bit of melted chocolate.
- Grainy? Beat longer and make sure ingredients were sifted.
How to Use This Frosting
This frosting is highly versatile. Here are a few ways to use it:
- Cakes: Ideal for layer cakes, sheet cakes, or snack cakes.
- Cupcakes: Piped with a star tip or swirled with an offset spatula.
- Cookies: Use as a filling between sandwich cookies or piped onto sugar cookies.
- Brownies: Spread on top of cooled brownies for an ultra-decadent treat.
- Dipping: Serve with pretzels or graham crackers for a party-friendly dessert dip.
Storage and Make-Ahead Tips
- Room Temp: Store in an airtight container at room temperature for up to 2 days.
- Fridge: Keeps for up to 7 days in the refrigerator. Let it come to room temp and re-whip before using.
- Freezer: Freeze for up to 3 months. Thaw overnight in the fridge, then bring to room temp and beat to restore texture.
Comparing Buttercreams: American vs. Swiss vs. Chocolate Ganache
- American buttercream (this recipe): Sweet, quick, fluffy, and no eggs—perfect for everyday baking.
- Swiss meringue buttercream: Lighter and silkier but more time-intensive (requires cooking egg whites).
- Chocolate ganache: Just chocolate and cream—richer, glossier, and more pourable than fluffy.
This chocolate buttercream is the most user-friendly option: minimal steps, maximum payoff, and endlessly customizable. Whether you’re baking for a party or just want to lick the beaters on a Saturday afternoon, this is the recipe to keep on hand.


